sheet2graph command-line program
Ep.19 - Distributing our command
57 minutes
We will start preparing our command for distribution in pypi for it to be installable with pip, and testing the distribution in a test environment.
• Finding a proper name for our command
• Folder structure and necessary files
• Changes in the entry point of our program
• Generating a good README file in Markdown
• Examples and documentation
• Choosing a license
• Dependencies and versioning
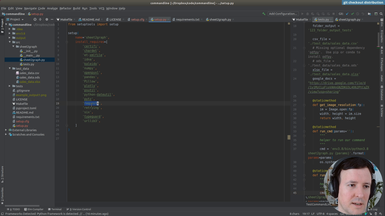
• Setup.cfg and setup.py
Transcript
now let's move on to the distribution so we
created our command and it's working well locally
but now we want to share it with other people right
so um first of all let's create a branch we can call it distribution
okay since we have a file here yes we have uh let's delete this file
uh we must have committed a temporary um open version of the csv so because of
this we have to remove it now
okay so now everything is correct and then distribution
so what we mean by distribution like during the the video we've been
installing uh packages like this like this in the
requirements uh using a pip like
here right so like pip install so what is this pip like when we type pip
install something install pandas what is this doing right
and we want to have the same for us we're gonna have here click install
my command will change now the name from my command but
we'll have something like this so what this is doing is checking from
a repository called i i p ip
this one right the python package index so basically here
there is pandas and this is why we can install pandas
uh okay please yeah exactly pip install pandas
so what we want is to put our our code here
our um our project here um this will allow anybody to install
our code so our code we end up being one of these
dependencies on somebody else's project so that's quite cool it makes it very
easy to install so we have to give instructions to
people first make sure that you install pandas and numpy
now we just create our project and we upload it to this repository
and then people can just do ppinstall the name of our project without you know
those dependencies will be installed automatically they don't need to
to take care of anything but this means we need to take care of
everything for them so we will need to to package the things in a specific
format to here have a specific structure of folders
and certain files that the repository needs
so let's check that we called our command
my command right um we're gonna need a better name
uh for that so um the name i came up with it
with uh is a sheet like spreadsheet sheet to graph so this could be a
comment i think that reflects what our command
does it could be something like this sheet to graph sales data something like
this i think it's a good uh a good name so
let's see if it's already used in in this repository in
the python repository and if not we can use
it so let's see to graph
okay there's other sheet two api sheet to db
so it's a kind of an idiomatic uh one sheet to dict
uh so i think it's it's a good one so let's uh let's switch
all our commands and references to to reference this sheet to graph instead
of my comment right so first of all this is my command i'm
going to change to shift to graph and then we're gonna
need to do the same um for all the tests
all the references of my comment so let's see here
i can search for my command exactly so here there's
a couple right so this is going to be cheap to graph
i can make sure that still everything runs um
okay let's in our make file exactly here we also hardcoded
the previous name of the command so let's say
okay so this well here's some commented ones
let's also do it like this and this should be it
uh let's just run this run or the tests to see that this
still works let's try around first okay it seems
like it runs correctly let's run the tests
okay it looks so far that it's running correctly and it will work so we're
gonna commit this change and and then we're going to start
restructuring how these files are [Music]
are laid out when which layout they are they are put
to prepare them for the for the packaging so
we're just waiting for the tests but we can see already that
all of them are running successfully so far so this will work
exactly so let's just commit these changes
okay and then change name to graph
very good um now we're gonna need to to package this in a different way
for that we can check one of the guides that python has for us already so
python package packaging and here is a user guide
okay there's a couple of them let's look for
one of the official ones maybe this one yes this
one uh well so i use this as a reference
uh there's of course a lot of options here competing uh
ways to do the packaging so you can do it in a lot of different ways but i will
just do it in one way that works for for this
project and so at least you will get like a feeling
of one way of doing it that actually works
so first of all we can see here that it asks to put it
in a specific format right like inside the source folder then the
name of the package then this init file so that it's like a
package or a module so this file is needed
depending on how you want to do the imports when you want the python to be a
module like specific file to be a module so there's also other files here like
the license this project file a readme to give ins
and markdown to give instructions to the users
and then this setup config and setup by the setup
is optional um yeah they can even be a test folder
so there's a lot of stuff so let's start by doing some of this
because there's a lot of them so first of all
this is our folder and we can create a source directory and inside the source
directory we're going to put another directory with the name of our
command right in this case that's sheet2graph
and then we're going to put our command in there
here it is okay i don't know if you can see it here
but here it is right then uh we're going to delete all these excel
files that we have here because um we don't want to distribute them
we're going to distribute the test data ones
here but not these ones at the at the root level right
so let's just delete this okay uh then
um they were also mentioning also mentioning this you need to pi
right so what we can do here we can create the
init uh here at the same level so that's two underscores before and
after and we're also going to create a similar
one but with main which is also important for
some depending on the style of our imports
this time the file but it will help us later uh to have a
command line version of this so you will see you will see in a second
but basically we have these um we can also have a tests folder
i'm not sure if we're going to use it like this but uh let's create it also
so that would be parallel to the from the same level as the source file
right so here we can create a test folder
i don't know if we will use it yet but uh in the test folder also we can add an
init file so there's a lot of ways to do it here
but uh are not inside sorry not inside test data but inside test
okay so there's a lot of ways of doing it but we'll
we'll figure one one of them out um and then the tests
the tests could go inside the test folder but because we want
remember we want to trigger ours from the same command so our same
command here as a way to test itself because of this
we're gonna put the tests inside the actual code of the program so
like here okay because we want the user to be able
to trigger the test like this and like this packaging system
that we use um it has ways to test ways to specify dependencies has tons of
options uh but we're gonna use one of them only
for this so yeah you will see so right now we have
the our source folder with the name with the
init then um we need first of all this init
i mean right now the init we have is empty right so if you come here
and actually the the action happens here on this file on the shift to graph so
we're gonna need to to make this init um
do something here with the [ __ ] to graph like to
to kick start the process so we can do that
uh the following way so first of all okay if we open this one the sheet to
graph we can see that there is a main like a main method here
i mean but there's a lot of things happening
here that don't have a function and we're going to need to reference
this from the outside so basically we need to put this into a function
so basically we can put all of our program in a function that we're going
to call entry which is the entry normally it
could be main but we already took main so
and then here we just got empty right so this is the same as we had before
but now the whole program is in a function entry
f entry and then we're gonna use that um uh to be too cold to call it so
um and three yeah here we need to put some balances to remove this mistake
okay so this is good this same as before here needs two
spaces and because now we we can just call
entry and we're gonna do that from the init
one so if we go to the init file where we were here
we're gonna import from the current one import ship to graph computing already
perfect and so this is like a relative import
and then what we want to do here is when you run this init
same as before if you have this name we're just going to call the
sheetograph.n3 this way people can just use this
and it will cleanly enter and then in the init we just have how we call it
and then in the sheet to graph we have the whole thing with all the details all
the options so this is a a bit cleaner and later
we're going to use this entry point also to have a command a command script
so we will see it in a second it will be much clearer but basically
um we don't just want to install this like
let's say pandas where we can just import it like here
but we also want to have a comment in the comment line right we said we want
to have a command like this and this requires
like some special configuration so right now this is not found but by
the time we're done this will this will be found so this will exist
and this will be installed with a pip install so
it will be automatically set up for us let's see we have the entry point here
now let's see if we follow this guide we can see there's other files right
there's a readme a license uh by project
so uh let's start by this by project so this basically is like
something needed to build so it's very it's saying which
basically when we generate this distribution that later we go into
into this uh python repository uh this libraries that we need uh just to
generate the distribution so not libraries that our script requires
but library is required to build it and this is what this file is saying
so we can just create this project it needs to be like this by project.com
and it needs to be in the root directory right
yes so by project thomas is just like
like a serialization format thomas obvious minimal language right
it's like a config file a minima configuration file easy to read
yeah so it's not a dislike could be like json or a config
file but it's just used like this okay so we
created our file here uh okay and this is just saying that it
needs this packages setup tools and wheel and wheels is what this is
generating is anything like a wheel it's just like a
kind of a file used for distribution so we just set up this
uh pi project. here and you can see what other
files are we missing so the readme the license
so let's create first the rhythmic so we can have it here
so this is a convention to have a rhythmic file
in this case it's marked down that's what the md means
and this is just like when you go to like a github
and you check a project let's say i don't know let's check some random
project another jackie
okay and if i go here to the jekyll github
repository all of this text is coming from the readme right here you can see
it mean markdown or md also would work so we want this we want to have some
instructions here so when people see our repository
they they have an opportunity to know what
what our project is about so um one way we could do this here is uh
we've been working a lot in
in this comment to have a useful help right oh
something is uh failing um basically we want we can start by using the help we
have that was automatically generated from the
options to create the first part of the readme so this way we can start with
some useful options or how are you called the command which
options are optional which are mandatory but to do that we need to fix this
mistake first so uh can open sheet to graph
dot pi no search file or directory okay so uh the problem
is that here we change the path right right now there's no sheet graph
it's inside source sheet graph two so let's just change that
key to graph exactly exactly and the same here
okay and the same here okay so now the help and the tests
and everything should still run so let's try it with the help
okay and now it runs right and we can use this
to begin our readme so we'll just copy it
i'm going to put it in the read me okay it won't be the only the only thing
but suddenly we got all this documented
right so it's useful to have a good help then what else can we put here um
we could put some well first we could put like a title
we're going to remove this this is going to be a command right so it won't have
this dot pi it would just be like shift to graph and
we can put this under usage so we do here like a
header two this is header one header two depending on the number of
of uh pound signs or hash signs and then it's going to be under usage
you can see how it looks like so it will look like this more or less on github
[Music] then we can put like a title with the
name of the command right and then we can we can explain so
for instance in this case i'm going to write like a graph
and then here we can put a link this is how you put links in markdown
if you have doubts on on how to use markdown you can just check one of
the many markdown cheat sheets and here you can see what we're saying
is a like an h2 this is an h1 you can see how it looks like and you
can also see how to make links how to make images
so this is like a simple syntax but sometimes you will need to check so
you can check one of these guides like this is a good one for instance
um so okay so let's let's continue this so basically i want to
write here a link to the website from zero to full stack
so i'm gonna write here this is the the text that the person will see
to and this is the link and the link is
is tag.com slash courses and this course
okay so this will look like a like a link
like this and this would go right to this course website
i made some typo here okay so we have like a small
introduction um saying that this was developed for this
course and then the usage and we're gonna add a few examples here
and also then don't worry if this readme is not very
complete on the first comment the first comment could just be
like a simple readme and later we could make it uh
much more complete so you don't need to get it perfect
on the first try right so the examples what we're going to say is for instance
show how a person can can show the contents of a csv so like
printing uh printing the spreadsheets
contents then we're going to show how they can filter it
all right using these range selectors let's see uppercase so selecting data
and then we're going to show how it looks like the
result so the output example output graph okay
so then first of all printing the the spreadsheet contents
so here we can show with this syntax you can hear some code and this will
this will be shown as code right so if i type
anything here you can see it shows like this like code
right is what github uses these two so for instance to show parts like this
it's also in the same style um so here we want to show
an example of running this so what we can do is
first of all let's see on the make file let's close some of these files
okay so on the make file we have here some example one
example so first we want to show um how it shows the whole file right like
something like this but now sales data doesn't exist right
it's only inside test data okay so
[Music] okay this will be inside this data
but we'll still run the command like this so and one will be
print only so this first one is print only
so we want to find an example of running the program so what we're going to do is
change this data this will be an example of filtering so let's try it
no search file of directory okay this should work
and here it is but we wanted without filters so first
say csv doesn't matter okay so this is the example right we
want so if you run this command this is the output so
here we go to the readme and say when you run this command
and here we can put the output and the output will be this so people
can see that this has the letters the numbers they can get the
feeling of what our command does right i don't know uh that is useful so we
need to explain why it's useful um okay and now let's think here this is
the command that we're running right now but the end user is just going to
run the command shift to graph so we can just remove this and this is
where the user will run and also the the end user
they will have the csv anywhere right so let's not complicate here with the paths
and let's just show the important part so this like print only option is
important the csv so they can see they can use the csv
the name of the command and this is the output so we see this will look already
a bit more decent so examples printing the spreadsheet
contents selecting data example so
this we had then selecting data we already have it
we deleted actually so this one this one is selecting data right so
let's copy this one and we'll use it also as an example
so same thing we got here with the bash
and then here we have the output so it looks like we're
losing a bit of time with the readme but it will be a little bit worth it because
then if you have documentation people check
the documentation so you don't need them to
to answer you need to answer ask questions everything is clear since the
beginning if somebody checks the documentation
maybe they expect something very different maybe they expect like a
graphical user interface they can see immediately that this is a
command line uh application it also says here no
command developed um so they get more information
then here we're gonna do the same with before so we're gonna remove
all the examples that the user will never see so like this
and the rest we're gonna keep wanna keep the x the y
and maybe here the output file name x label y label is not needed because
we're going to show selecting data right so
like this print one and then for the output graph
we can show that so the output graph we can have the command
so the command will be like this exactly so this generated the command
okay okay so it will be something like this
and then without the extension again and also without the this sales data
prefix and we have the output file name is not needed
so we can we can keep it as an example it could be without also but
let's keep it under labels okay so like this it generates
and then we can use an example of what this generates so
we just run it exactly so it will be created here right
so uh just a second so here we can see the output
which is inside test this is the output we just generated
so we can use this image um so first of all let's include this image
in the repository itself right and so for instance on the root and we
can call it like output or like example output
output one and then we're gonna add this image in the hit the mark down
so the syntax for images uh you can check it in
in a cheat sheet here so basically it is like the alternative
text and then the
the address of the image or it can be a url or a local
addressing and then a title text okay so let's see so in our case
uh this will be the image is right here right so it's on the same level
and we need like exclamation mark then we can put like some kind of
alternative text that explains the image so
example output is a good one and then here we can just put like uh um
the address and with this it will show in line right
like this um this is just a intellij mode for markdown so you can see like
both or like only the text only the graphic
in github this will show the same and there's a chance that we need to change
this um for a url but uh we'll deal with that later for
now um i think this would be without with me
and we get a pretty good readme that shows like a
name of the comment that is part of this course
show some examples on how to use it even the output with images which is always a
good idea to include images and then it shows the usage with all the
options so um which we took from the from the help
right maybe the usage if you see here is like
all in one paragraph right it's not very easy to read
whereas here is pretty ordered so i think the
the way to keep this ordered could be to use this baxter backticks
so it could be printed as code so you preserve this
these spaces and like this shows a lot more ordered so then
anybody can see now how this is called all the options
so let's commit this let's see what we have so far
um okay here we are and we got like we changed the the folder structure
and we changed some of our commands in the make file
we removed some files that we don't want to distribute
and we have this init and main the tests uh we have
this my project and the readme so let's comment this for now
and we can say like uh we can say like uh started packaging
for ip by pi i'm not sure for the python project index yeah
okay so we commit this we also need to decide on the license
this is a complicated topic um well basically we're gonna create a file
called license like this uppercase is the
convention you can see here that it was recommended
in this packaging guide as well um the license so uh there's a lot of
different licenses and they are very nuanced sometimes
um so a little bit outside of of the scope of this tutorial but
uh but basically you have a lot of them right and
and then some of them are open source some are not some and proprietary
in any case it's good that you choose one license that you agree with
and you put it in the project it's better than just uh not having any
license uh so it's a complicated topic but if
you want to to read about it you can check for instance
github has like um some guides on how to choose a license
there's even a website like this choose a license when you want
if you want anybody to do whatever they want with your code
then you can choose like a mit license if you want people to not be able
to improv so if people improve the code they have to share it with other people
then you go more in the direct direction of gpl
so they have different restrictions right some of them are very permissive
very easy to use but if somebody someone makes money of
your code do you also want them to share their improvements or
you're fine with them having improvements that they don't share with
other people so it's a it's kind of complicated and
for this project i'm going to choose this one um also
keep in mind that you can license sometimes under two licenses so for
instance you could have a genuine a new
public license and also a commercial license so there's a lot of options
then as i said it's a complicated topic but for now
i'm going to be using this one so this license basically
is free to share but if you make improvements you need to share them
with you make them you need to make them
available if somebody asks to see these
improvements so this way for something like for instance this course
uh anybody can get free access without asking for permission or anything
to do this code and they can learn from it but then if somebody could take let's
say this code and make it into a commercial pro
project they would need to share the changes that they did to the code
so in the case for this course it's a good compromise because i want people to
be able to access it freely but also i don't want people to resell
this as another course so for now i'm gonna
be using this one uh i would say one of the most liberal ones is the
mit one which you saw here this one right but this one allows
people to make profit of it without sharing the improvements
uh if i understand correctly in any case it's a delicate
topic people have very strong feelings about
one one license or the other is also linked to
open source and the open source code so just be mindful that there's
different restrictions in them and make sure that you choose one you're
you're happy with uh so let's go with the gnu or new
tpl version three and then i want to find the
actual license i want like a raw file
yes so this one looks good and then i'll just copy the whole file right
and then um there's different opinions but
it seems just including it as a license file should be enough sometimes people
include this at the beginning of each single
file like here there will be a full copy of
the license it's a bit annoying i cannot recommend you one i think in
general this is like enough just to have this license file and when
we package this this will be used so people will know
when they install this uh which license it is they will be able to check
so for now this is gonna be the license i choose um
and there's only a few files left can commit this license
okay and then we need a couple more files right
so if we saw in this guide um there were several files so
two very important files are the setup config and setup by
the rest we already have we already have also the
the actual code of our package so let's let's
uh go and create this uh setup config so we can go here
and just like set up configure it and we also create the setup dot
bye okay so what are these two files so uh basically these files will tell uh
python how to package this right what's the name of the
our code what's the license it's all the information that uh
that the repository needs to show here so for instance if we check
i don't know one of any of this let's say this g2 api
so here it shows installation examples it shows where's the home page it shows
[Music] anything basically all the information
that shows here it shows that uh which language it uses like python
specifically three it's always independent so all of this
is specified in this file in the setup also it specifies all the dependencies
then why are there two so there's a config file and a python
file so there's two because i mean there
could obviously be one but the idea is that
the config file is just static right it's
like text so a config file is not too incomplete
right um or it should not be and
then the python file is a proper program so you can do anything it's much more
powerful no you could do something dynamic but it's also more
dangerous because if you run this basically as a text file
it's totally safe you're just reading options saying this option is true or
false this number is like 22 or the name of
the file is this but the python one is a full program
so this always has more inherent dangers than a config file
so because of this it's recommended to use the config file
as much as possible and the python file only for things that cannot be done in
another way so i'm going to do this here
which is we're going to write most of our configuration
on how to pack this in the config file and then we're going to use the
the python version the setup pi for the dependencies because for some
reason i didn't get the config file to work with dependencies
and they work when i add them to the setup.pi
so we're gonna we're gonna do that so we can find some example
of how this works like python setup.config okay so here you get like
well there's a lot of different options this is a bit like a more low level that
i would like um i would say here this exactly
so here you can see an example of the setup config file right
um yes here is a good description the configuration for setup tools it will
set up to so your package name version which code files
etc it says also some of this configuration can move to
by project file there's like several files that are kind of competing
and but we don't care about all of that we just want to distribute our package
so um here there's all the warnings things that you should do
etc so what we can do is just copy this and then we're gonna change the details
as we need so let's see replace with your username
here is the tutorial that they were doing so
that's why they they say your package should have your username
but your package can be anything right so oops
our package name is sheet2graph version
versioning like if it's like one it's like stable
and the more only these numbers are increasing the more they're just
updates or like uh they're very unstable software because this is extremely
unstable is our first release and we're going to start with really
small numbers so 0.0 point something so anybody that knows this can
just take a look and see the software is not yet very stable
once the software is much more stable has
like more options we know that it works in a lot more cases
we can increase slowly the other numbers until maybe at some point it will reach
like 1.0 2.0 and then people know that this is a
software that they can rely on and then in case of the author i'm going
to put my name here you should put your own my email
be mindful that this email will be public so if you don't want to be
spammed in a specific address don't use that one um some descriptions
this is a very short one like this then you have a long
description and and this means that it's going to
take the value for the long description from the file
in this case it's going to take this as a long description
so for now we're going to do this so it just references the
readme the descriptions in which format in
markdown and then they we have here the url
of the project right so this is the github or it could be a gitlab or other
uh provider but basically this needs to be the
the url of your project in my case this is a underscore repository
so from zero to full stack so as you see this is exactly the repository where i'm
committing so i'm showing everything there this is
the url and then because this is on github here
will be the same so what's the difference with this
second one um that this one is the issues section
right so it's where people can submit bugs so
you can see here if i just visit it but let's say
i visit this one first you can see here that this is the
repository as it is right now and then here you see the issues tab
then here somebody could say oh when i generate a csv with these options
the command breaks or it doesn't output the image
etc so this is why he would need this issues url which is this way
so this url is the one that we're showing here
okay so far we have the description who's the author a way to contact the
author with the email then these classifiers are all the
things that we saw here just a second exactly so here right
who's the audience what operating system so basically
a lot of metadata about what is going on here if it's related to like a network
or if it's related to graphic processing so we can see
we can see here so priming language python 3 this is correct
license this is like a kind of open source initiative approved
mit license right but we don't want mit license
uh we want the one we used here with this new new general public license
version three specifically um so we need to change this and we don't
want to just like right here and we need to make sure that
is the correct one right so let me just search for this
so that we can see exactly [Music]
exactly here list valid type e licenses right perfect so from
here we can choose one so in our case is uh gpl version three
it's open source initiative approved because it's an open source lessons
but we can just copy this part so you can do something like this
just don't write it it's better to just look for one of this list and
and use this right then operating system is always independent
perfect package this source which matches this
packages this will find the packages in here so we don't need to specify
manually where we'll find the packages in source
python needs to be higher than 3.6 so this looks pretty good and then we're
going to add a couple options so um
actually just one option so what we want is
okay we want this to create a comment right
as this is right now you could just install the pack the
package same as like let's say pandas oh here we use for instance pandas
so if we install our if we set up our library like this somebody could like
import sheet to graph and then call c to graph
dot entry or use some of the methods there
but we don't want it to be used like that
we want this to to be a comment right when would it be a command like this
so to specify that we want that there's an option in the config file called
console scripts so we can just double check here these
entry points this is it here you have a perfect example of this
so basically you have this option options entry
points and then here you can set up a script so yeah this address is perfect
for this because it has like a very minimal
example uh but let's just use this one i'm just
pasting it here okay options entry points right and then
console scripts here the example says hello world but we
want this to be the graph exactly and then what this is
is the direction to the module right so let's let's see
we have one level from source right sheet to graph
dot sheet to graph and then inside this one
we want the entry function so that's another one of the reasons why we put
all the program in the in a single function so the syntax to
specify this here is uh this is the method right
so you can see the example here this will be the equivalent to our entry
and it's this part after the column so what we need to do here is
shift graph dot shift to graph and then this is entering
so it will go this folder then it will import this file and inside this
file it will call the the entry method this
so it will execute the program when we run
sheet to grab so that's all good and with that we have the
the setup config then what i'm gonna use the
the setup i4 like right now it's empty but uh we want to use it
for the dependencies so as we saw our program
here depends on all of these right some of them are in the standard library
like sis or like path leap or arc pass but some
like type guard plotly pandas they need to be in the
user's computer so and that's why we specify them in the
requirements right so we're going to add them here in the
in the setup and um for this we can search for
setup by install requires yeah so there's different ways to do it
you can also do this in the config file but i didn't get it to work
and um we just want to ship a comment so we don't want to
package things in the absolute perfect way
we want to make sure that we don't make any mistakes but we can use both right
we can use the config file and the python the config file is preferred but
the python one is also perfectly fine so we're just gonna use it
and it works so let's see if we find this
exactly so it will be something like this but
let me see if i can find exactly install requires here
so we'll get something like this uh just for the syntax to go a bit quicker
i'm pasting but basically this is using setup tools
and from setup tools it uses this functions app and then it just calls
setup right so we don't need any of these versions
packages it's just the install requires and we're
going to put here our name and then the install requires um
we can just copy these ones but uh it might be that our
the versions we specified here let's put this in as a correct list in python
oops it might be uh that okay so this is the
output of our requirements that comes from
running this right from the freeze so this is everything that we have
installed in our visual environment remember
like this right all of this yeah and then these uh specific versions they
are so specific uh only because they are the ones we
have installed but uh this doesn't mean that this could
only work with plotly version 4.14.3
you know it could work with any plotly maybe
um so what we're going to do is we're gonna copy the requirements
but we're not gonna be so strict uh we already copied them
uh here but we're not gonna be so strict with the versions right we're just gonna
say okay you need this and then if it breaks we're going to fix
something before the um for our users but for now let's just remove so we
leave this only with the name of the package right
this could be delicate because there could be things that only work in
certain combinations but right now it's not necessary to be
so specific with with the versions like we don't want
people to installing these specific versions just because
we're lazy now this we're just gonna remove all of this
probably we could also remove a lot of this right like
like probably i don't know your lip is here because of requests
probably like some of these libraries i didn't install manually right probably
they come from numpy so we could probably delete a lot of
this and just have like numpy maybe you can even do that it's
basically this i don't know what it is um
so let's say if numpy depended on some of those
they will also be installed so let's just put the ones we care about and then
they will install their dependencies so caledo we
want is the kind of back end for svg
and numpy we want this for excel pandas pillow for images floatly
this with an install ourselves they detail also python tension also
retry and also we install six also note and that guard with it
so you can leave it in something like this then
these are the packages that are required to install
then um this setup file has another one that is called setup
requires so this is not fully correct but go with
me here for a second so basically it has an option like this
right setup requires so setup requires are the
the libraries that this tool needs to build
the package so um basically our user will need like pandas
but you don't need pandas to build this package this package can build
by default without including anything here um
i mean it needs like setup tools and and these tools we saw before
but we don't need this we don't need to add them here uh
regardless of this i'm gonna add here the same libraries and a setup requires
why because i will see very soon and we're going to be pushing this to a
repository and if we make any mistake we need to
push a new version right um and i want to make sure that this
builds before so by having here the same libraries um
i hope that if there's like a contradicting version between the
libraries it will break before we push it
so that's the only reason why i'm adding it here and
probably once i add it and i see that it works i can just
remove this that is convenient because then this will break
during the generation of the package and not once i have distributed this to
users i install it and then i see that it breaks then i
need to set up another version you can see here the version so this
version as we will see very soon and this version will be increasing and
it can only increase so um we'll see in a second but um
basically with these two files we have the setup finished right
uh i think are we missing some other one let me just very quick
call the freeze requirements again is there a new one here no okay so
nothing changed here let's just check if we get started
no so requirements didn't change so we're not forgetting any of them perfect
and with this we have i would say all the facts that we need is in the
right hierarchy and there's some tests here
there's the setup first by project yes so uh we're gonna need to start uh
checking how to how to get our code in this repository
right so it appears here um so people will
you know they will be able to check here and here our tool will appear so this
will have an impact in the real world so i would recommend
also uh if you're following this you will see
there's a way to test this but basically if you're not really
publishing a tool don't publish it uh here because you you would be like
spamming here something that nobody wants to see
so just make sure that you're mindful that where the package that you're
preparing uh you will see now that there's a way
to test it but uh if not if you really want to put it in
the real repository make sure there is a tool that does
something no it's not just like an example that says hello world or
something like this because otherwise you might be blocked
from the from this repository right it's like a
place to put useful stuff and uh yeah it should be you should be
mindful not to spam these like small projects
um but let's see let's commit this and then we'll see how to test it so
first set up
files config for most of it and i for dependencies
and the dependencies have not been two exact versions
okay
Clone the repository
git clone https://github.com/fromzerotofullstack/sheet2graph
and get the episode branch
git checkout distribution
Episodes
Ep.1 - Introduction, repo features and environment
(17 minutes)
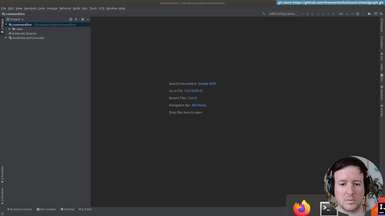
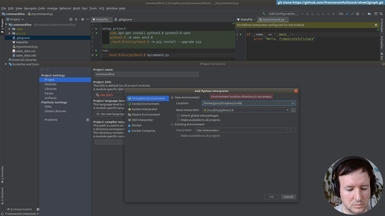
We explain how the project will be structured and what we are trying to accomplish.
• Settings up the project
• Configuring a virtual environment
• Making a simple command that outputs a string

Ep.2 - Loading csv files
(8 minutes)
We create a Virtual environment and setup the project.
• Organizing commands with a Makefile
• Creating our Virtualenv
• Installing packages
• Using requirements.txt
• git branching
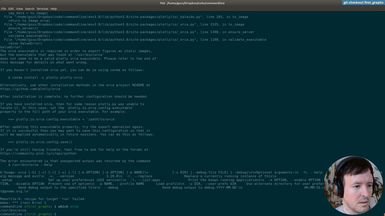
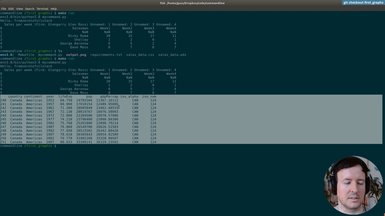
Ep.3 - First graphs
(19 minutes)
We save out first graph from the spreadsheet data.
• Installing Plotly to generate graphs
• Pip freeze requirements
• Solving dependency problems
• Using Pandas to do simple data processing
Ep.4 - Saving in a folder
(5 minutes)
We will create a folder to save our image to.
• Saving the image in a folder programmatically
• Using Pathlib
• Add folder to .gitignore
Ep.5 - First commandline options
(19 minutes)
We will add our first command line flags/options.
• Using argparse to parse commandline arguments and generate help
• Optional and required flags
• Add input file and graph type options
• Graph different graph types
• autogenerated help
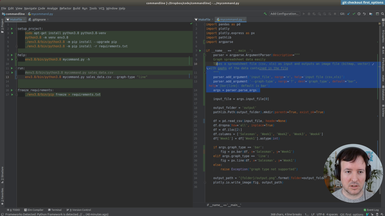
Ep.6 - Output options
(22 minutes)
Here we add an option for different output locations.
• Using argparse to parse commandline arguments and generate help
• Combine options to output with a filename and with a folder
• Precendence of command flags
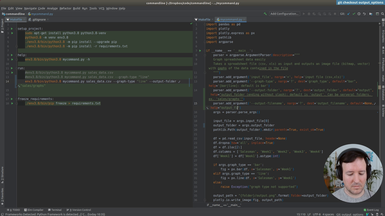
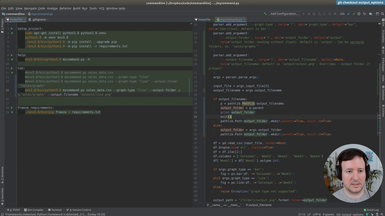
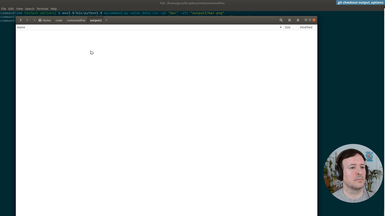
Ep.7 - Output format
(13 minutes)
We add Scalable Vector Graphics (SVG) output support.
• Add several output formats (svg, jpg, png) to our command
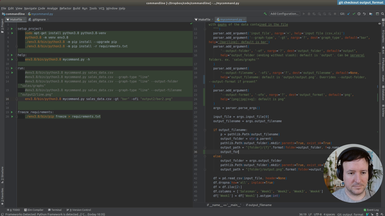
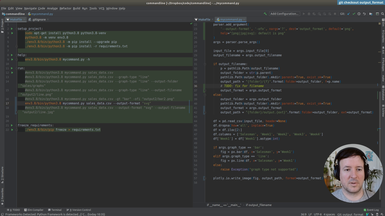
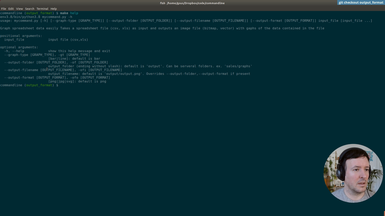
Ep.8 - Generated image size
(6 minutes)
We will add output options to specify the size of the generated graphs.
• New option for output size
• Default and custom graph sizes

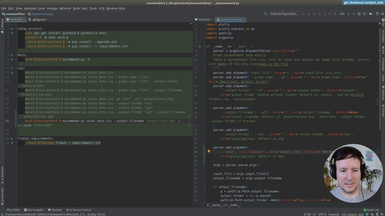
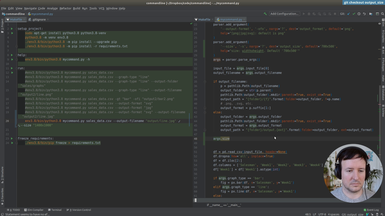
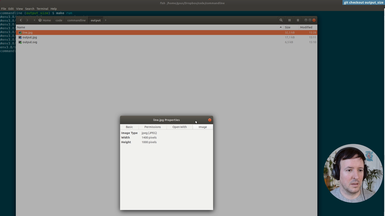
Ep.9 - Refactoring and type checking
(22 minutes)
We start refactoring what we have until now, and add type annotations.
• Add basic annotations to functions
• Use Typeguard to enforce the annotations at runtime
• Annotations as a kind of documentation
• Add a new type of graph: the scatter graph
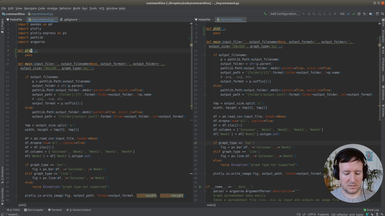
Ep.10 - Reading excel files
(16 minutes)
We will add support for Excel files (.xlsx).
• add dependencies: Openpyxl and Xlrd for Excel support
• Fix type errors
Ep.11 - Reading a file from Google Drive
(15 minutes)
In addition to a local file (.csv, .xlsx), we accept a Google Drive public document as input.
• Parsing the url address of the Google Drive document
• Adding the input option transparently for the user

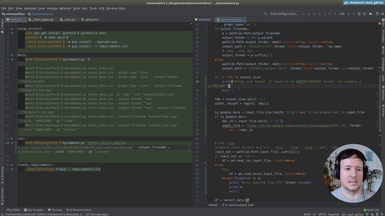
Ep.12 - First tests
(16 minutes)
We will setup testing in our project to check the features we implemented.
• The unittest module in Python
• Add a test target to the Makefile
• Test loaders
• Assertions in testing
• Adding tests cache to .gitignore
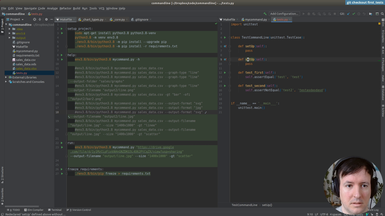
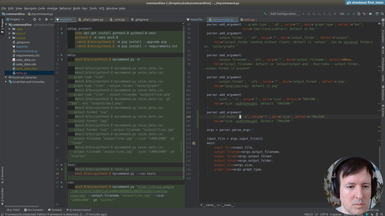
Ep.13 - Testing helpers
(16 minutes)
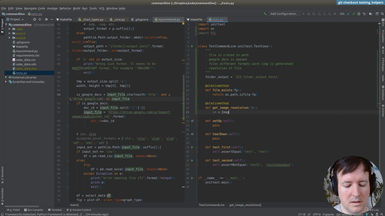
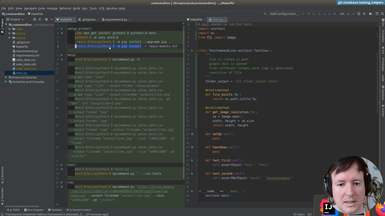
Once we have the infrastructure for testing, we will write a few helpers to make the tests more concise and easier to write.
• Setup and teardown in a test suite
• Using Shutil to deal with filesystem operations
• Checking that a file is created in a specific path
• Checking the size of an image with PIL
• Running a command line application from a test
Ep.14 - Writing tests
(32 minutes)
After the testing infrastructure and helpers are ready, we are writing the tests for our commandline application.
• Testing input files
• Testing location of output files
• Testing generated image sizes
• Testing graph types
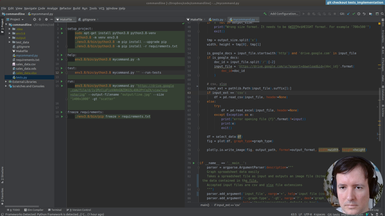
Ep.15 - Print version
(24 minutes)
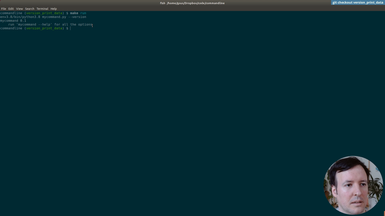
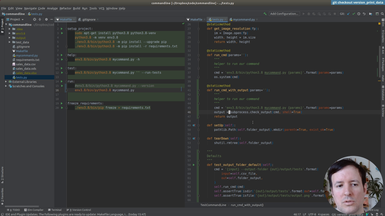
We will be making our command a bit friendlier, improving the default behaviour with informative messages for the user.
• New option to print help of command
• Print version of the command
• Default behaviour. No flags prints the version and exits
• Testing the output of our command with os.system and subprocess
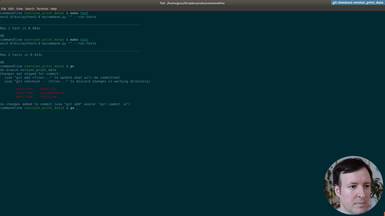
Ep.16 - Print data
(33 minutes)
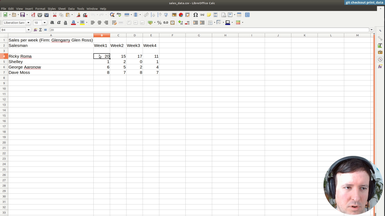
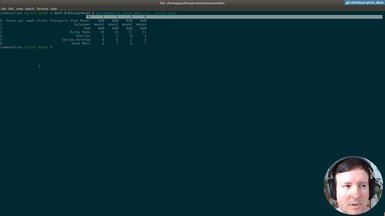
After using hardcoded column names, we will start making the spreadsheet processing generic. This way our command will work with any spreadsheet file. The first step is to print the data of our input file, so the user can preview it.
• Print-only option to print the input file provided by the user
• Transforming the data with Pandas to index it by letter and 1-based integer (as in spreadsheet applications like Excel)
• Adding tests for the new indexing by letters and integer for columns and rows
Ep.17 - Testing data selection
(1 hour 3 minutes)
For each axis, we will allow the user to use expressions like 'b4,b5,b6,b7' or 'B4:B7' to select cells or ranges to graph.
• Add options '-x' and '-y' to select the data to be graphed
• Making the expressions case-insensitive
• Implementing a comma separated selection option
• Implementing a range selection option
• Adding tests first and making them pass after implementation, as in Test-Driven-Development (TDD)
• Better and more informative user messages in case of error
• Verifying and fixing problems in our Pandas implementation
Ep.18 - Adding labels to graphs
(25 minutes)
We will check everything is working so far and add extra options to set the axis labels to a custom user-defined value.
• Debugging broken tests and making all tests pass after all our changes
• Adding an x label and y label options to our command, to specify the labels in the horizontal and vertical axis
• Debugging column types in pandas
• Using exceptions to deal with unreliable cases
Ep.19 - Distributing our command
(57 minutes)
We will start preparing our command for distribution in pypi for it to be installable with pip, and testing the distribution in a test environment.
• Finding a proper name for our command
• Folder structure and necessary files
• Changes in the entry point of our program
• Generating a good README file in Markdown
• Examples and documentation
• Choosing a license
• Dependencies and versioning
• Setup.cfg and setup.py
Ep.20 - Packaging and uploading
(20 minutes)
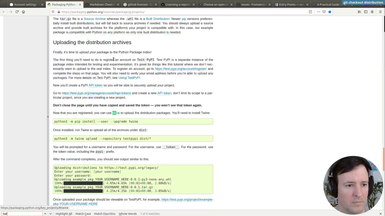
We have all the files. We will test the distribution at test.pypi.org before publishing it in the real repository. This way we will be able to fix any mistakes.
• How to test in the test.pypi.org environment
• Using Twine to distribute your module
• Creating a new account at testing (test.pypi.org)
• Secure tokens in .pypirc or interactively for testing
• Versioning increases with each code change
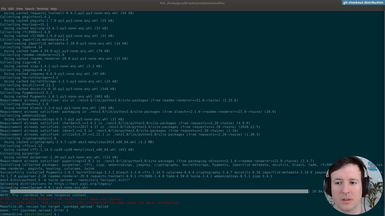
• Fixing errors and testing the new version in the test environment
• Problems with images as documentation in the README file
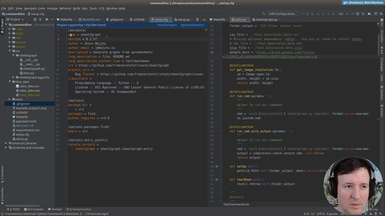
Ep.21 - Testing install
(19 minutes)
After testing at test.pypi.org, we will fix an error with the example image in the documentation and distribute our command 'sheet2graph' to the real production environemnt at pypi.org.
• Fixing error with images in README.md at test.pypi.org
• Creating a new account at production (pypi.org)
• New secure tokens in .pypirc or interactively for production
• Solving problems with secure tokens
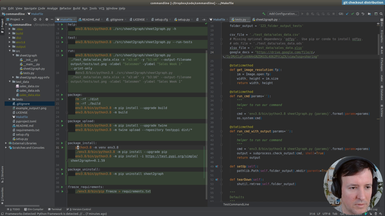
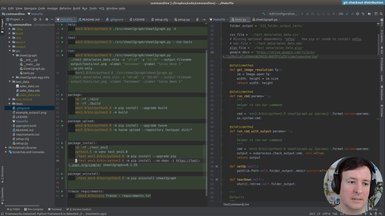
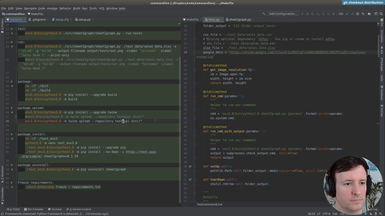
Ep.22 - Uploading to production
(6 minutes)
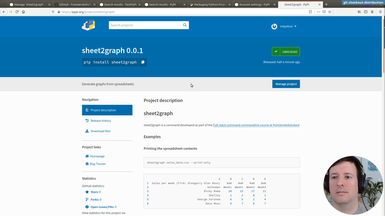
In this episode we put everything together and install our own command by typing 'pip install sheet2graph'. We test it both in a virtual environment and globally. We also talk about what this means to distribute code you develop easily to the world, something that now should be a lot more approachable. As always, we need to be mindful of publishing useful and tested code, and in general to play well within the ecosystem.
If you made it here I hoped you liked it. Subscribe or Connect with me on Twitter for updates on fromzerotofullstack.
• Solving problems with secure tokens
• Installing our new command using pip
• Testing on a new virtual environment
• Etiquette of publishing your modules and libraries
